
The Lists
CK:
2x Despoiler (Double Gatling) – One is the Warlord
Atrapos
Rampager
3x Karnivores
2x Beasts of Nurgle
2×3 Nurglings
IK:
Canis Rex
Atrapos
Knight Errant
Knight Paladin W/ Unyielding Paragon
4 Helverins
This Infernal Lance list was making the rounds after going 7-0 in a tournament and I wanted to give it a shot. The real thing I appreciate about this list is that it uses daemons to apply early pressure instead of Stalkers so it can handle opponents taking fixed much better. If my opponent takes fixed (Bring it Down/Assassinate specifically) I can play ultra passively and out-score them with tactical, forcing them to come out and kill chaff and then counterpunching them.
Also god damn does this list shoot. 72 lethal or sustained gatling shots going downrange is anti-everything.
The Mission and Initial Gameplan
We rolled a classic mission: Take and Hold on Hammer and Anvil on GW layout 1. This was my first time playing against IK with our codex and this game was mostly testing some hypotheses. We both went fixed (Bring it Down/Assassinate). I was pretty sure I was slightly favored because of the melee invuln and my shooting was more consistent. However, Canis Rex is some bullshit so it was possible I would just get owned and that would be that. We both recognized that whoever went second had a huge advantage in this match, but I was better equipped to mitigate going first.
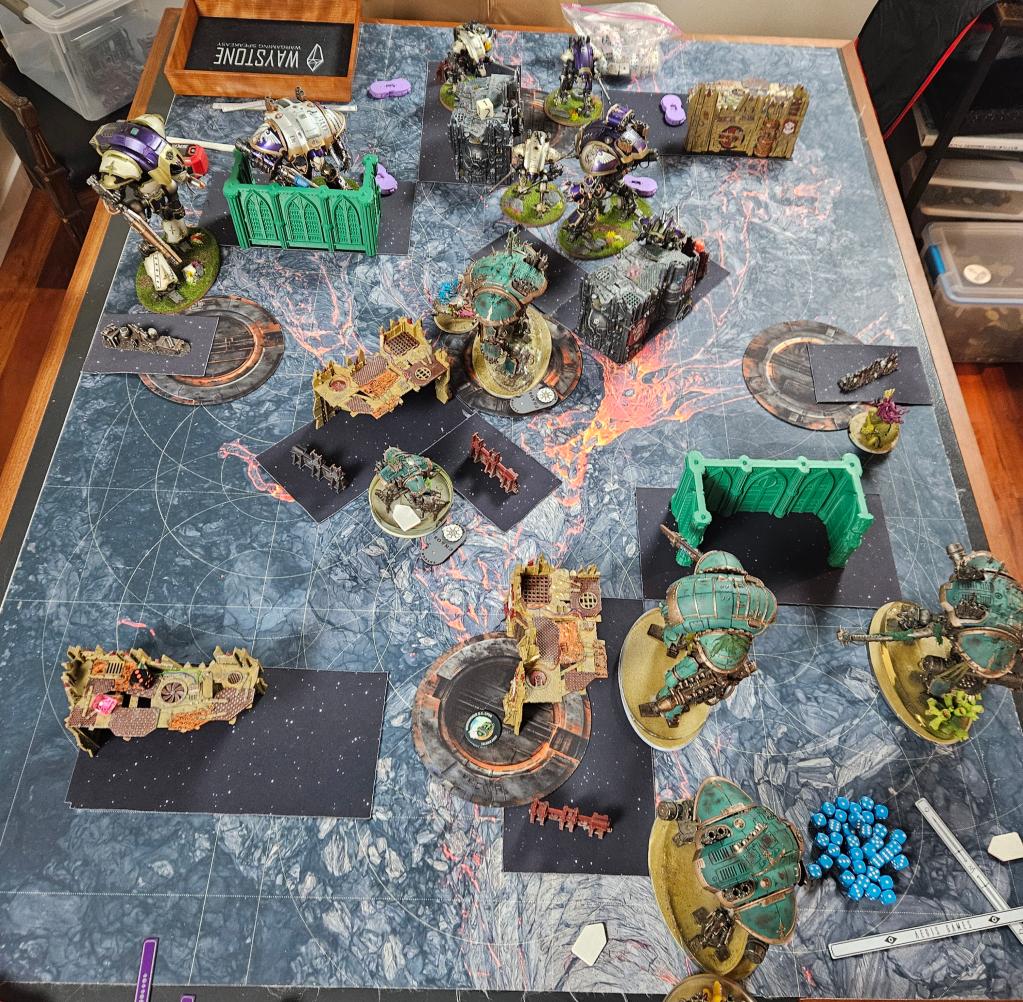
Deployment
I reserve a Karnivore and my opponent puts it all on the field. I briefly thought about reserving nurglings until I realized that their -1 to hit doesn’t affect titanic units and since I was taking fixed they wouldn’t be scoring points. I decided to deploy them in the center hiding so I could use them to body block and be annoying. (Also the Blue Scribes is a Beast of Nurgle proxy because I left him at home whoops).
Our deployments were very similar (shocking, I know). I knew my melee was more threatening so I positioned the Karnivores to 1) be near their Dad (the rampager) to get rerolls and also force him to play back a bit to not get immediately slammed. I put the Rampager so he could hide in the designated Rampager zone (the little cubby layout 1 gives you) and he answered by putting his Errant in a similar place.
I ended up going second and selecting Darkness for our army rule (-1 to hit). The board looked like this at the start of the game:

Round 1
My opponent realizes that exposing knights first is a great way to instantly lose one so his first turn is very passive. He simply shuffles some of them into better positions to counter-attack and brings the errant closer. No tactical means there’s no reason to get to parts of the board or do actions, so this game is purely about positioning. It’s also really important to bank a ton of CP, even more so for him with his fight on death strat.
My first turn is slightly more interesting. I sticky my home and get the rampager up to where he needs to be. The nurglings on the right side advance and position themselves so the Errant can’t get a good position without exposing itself to my entire army. The other nurglings charge out into the center to block him from just running out there and are positioned so in order to get free shots on them with the helverins, he has to bring them into a possible sightline.
Finally, one Karnivore touches the right objective. It can be shot from across the board, but getting that line means putting something into Rampager range. The Beasts hang back, ready to touch objectives next turn if they have to.
At the end of Round 1, the score is 10-10 and the board looks like this:

Round 2
My opponent understands that he needs to make something happen or he’s just going to lose the primary game because I don’t need to actually engage him to win. He brings the Warden out to play, hoping with the AoC enhancement he can soak shooting and then counter-punch. He does pick up the Karnivore with battle cannon shooting and also kills the nurglings.
Now I have to respond or he goes ahead in scoring. I position all my shooting knights so I can blast into the Warden and also be out of the Errants melta range. My warlord goes alllllllllll the way in the back because losing him and giving my opponent’s army a 5+++ is my loss condition. The Beasts come out because I know he needs to focus on the big boys and won’t be able to easily deal with them standing on points.
I try to get cheeky here and recognize my opponent desperately wants to fight on death, so I use Unleash Balefire for the first time ever. For people who don’t know what that stratagem does, it’s not your fault. It forces a battleshock after a unit shoots a target, and since my rampager is standing just outside engagement range, it’s at -1. Him failing that would have been massive but as is tradition, battleshocks are bad to rely on and he passes.
But he was really worried for like two seconds there.
He gives the warden a 4++ in shooting and I split a bit after shooting it down to 11 wounds, also chipping a helverin to below half.
I charge the warden and the Rampager reminds me to never actually rely on him, rolling 3 1s to hit and then only wounding twice. I cannot allow the warden to live, so I CP reroll a failed wound.
Pro Gamer Tip incoming: Don’t CP reroll. It’s almost never worth it compared to having CP to do actual strats later in the game. If you’re a newer player and are struggling to win games, my first advice is always to treat CP reroll like it doesn’t exist. It’s an absolute last resort because CP economy is so important in this army, doubly so when you aren’t getting CP from binning secondaries.
However, sometimes you gotta.
Anyways, I reroll a failed wound into a devastating wound because this game is easy, delivering 8 mortals directly to the Warden’s forehead. My opponent pops fight on death but only succeeds on getting one wound through because IK knights are so much worse at melee (yes Canis exists shut up). 8 damage is a small price to pay for killing a big.
Also, the warden explodes and deals 1 mortal to the rampager and 4 to his armiger and errant.
At the end of the round, the score is 25-17 and the board looks like this:
Round 3
I select units roll Battleshock below starting strength for my army rule since now I am suddenly near two wounded things thanks to my good friend the exploding warden. The Errant fails the test (huge) and the helverin is fine.
He sends the Atrapos after the Karnivore in the cubby so he can pressure my warlord while Canis and the Errant head toward the center.
Astute readers may have noticed there is a beautiful ingress point in the top right corner of the board. Good eye, you are so smart and beautiful. I slam my Karnivore behind the ruin so only one helverin can see it and prepare to attack his home. The Errant meltas the hell out of my rampager and canis chips the non-warlord despoiler down a bit.
The Atrapos charges and uses the renewed focus challenger card to reroll 1s to hit and wound into the Karnivore. I pop the defensive empowerment in hopes of scamming my opponent but it doesn’t pan out.
Coming into my turn, all of his bigs are exposed, so it’s time to make sure they don’t see the next round. I decide that the atrapos is less of a concern and focus on making Canis and the Errant very dead.
My Atrapos heads to the center so he can charge whichever knight survives my shooting phase. My first Despoiler moves out and touches the rightmost objective to deny it and rolls like an absolute psychopath, handing Canis 15 saves. Canis lives but is barely alive. This is why we bring two Despoilers, because the second one finishes the job and puts a bit more damage on the Errant.
Aside #2: This matchup is hard. Both of us felt like our brains were boiling from the cognitive load. I bring this up now because we both totally forget Ser Hektur is a thing and don’t put him down. I don’t think this change anything regarding the results of the game but was a definite oopsies. The Atrapos brings the Errant to 3 wounds.
Charge time. Atrapos into Errant, Karnivore into one of the Helverins on his back objective, tank shocking to make damn sure it dies. The Errant dies and my Atrapos consolidates in a way where his Atrapos can’t easily charge it. My Karnivore obliterates the helverin and consolidates into the other Helverin.
At the end of the round, the score is 52-39 and the board looks like this:

Round 4
His Helverin on the right objective fails its Battleshock and he moves his Atrapos to touch my home and remove the sticky, then prepares to charge my atrapos. He draws the Pivotal Moment challenger card, which allows his Helverin at home to fall back and shoot (deeply annoying). He puts the helverins into the Karnivore, but it lives on 2 wounds.
His Atrapos connects with mine and kills it.
At this point the game moves pretty rapidly. I Insane Bravery my Karnivore, move my Despoiler to retake my home while my other Despoiler stickies the point he’s on just in case and then kills one of his Helverins. My Karnivore doesn’t move so he can’t overwatch it to death.
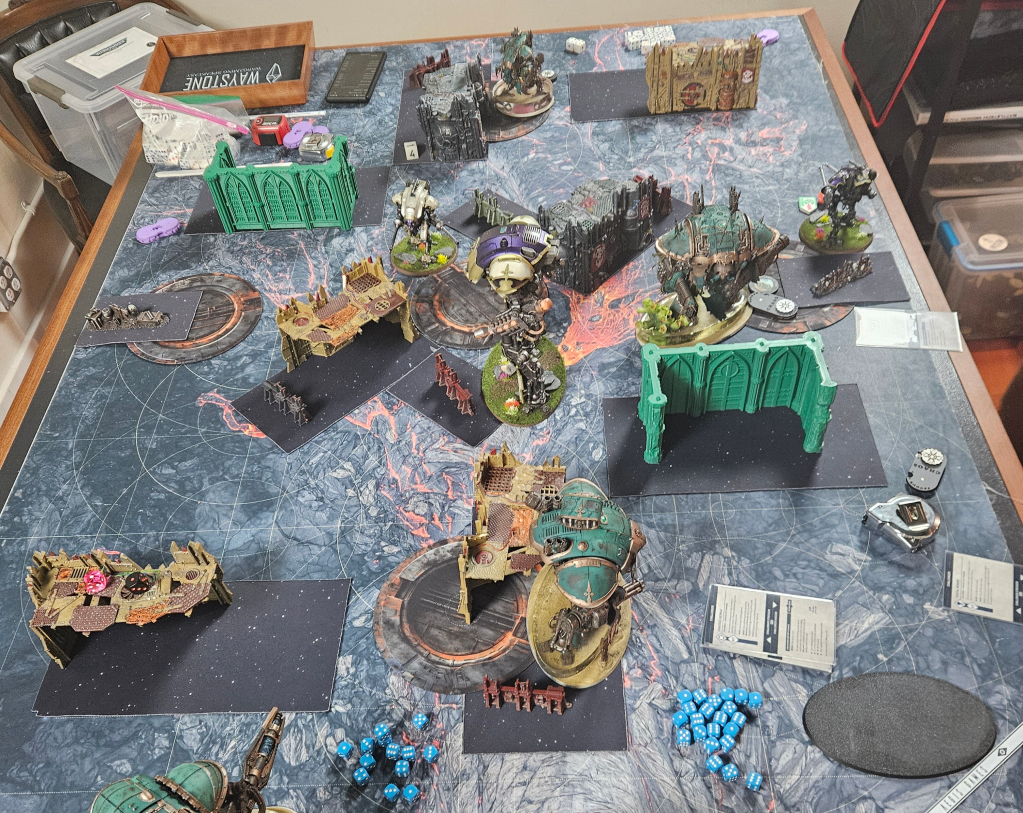
At the end of round 4, the score is 57-49 and the board looks like this:
Round 5
I select an additional -1 to LD for my final blessing and my opponent fails his battleshock on his Helverin again and we realize we can effectively talk out the rest of the game. It’s just a case of if he manages to kill anything else. He puts both Helverins into my Karnivore, who decides he will simply make his saves and take 0 damage. The Atrapos then bounces off the Despoiler.
I’ve already maxed Bring it Down, so I just have to see if I can kill the Atrapos. My Karnivore gets scared because he’s all alone, so that costs me 5 Primary points but I can’t be mad at his performance. I fail to kill the Atrapos and that’s the game.
At this point, it’s 9:30pm and my brain is so fried I forget to take a picture, but since nothing actually died between round 4 and the game ending it’s…the same picture.
The final score is 67-54 in my favor.
Takeaways
My opponent was still tinkering with his list when we played, and afterwards we came to the conclusion that 1) he really wants sticky in his list, and 2) the Errant isn’t where he wants to be. I think that if I played this again, I’d probably take tactical, but Infernal Lance has all the tools it needs to go toe-to-toe in the knight fight.
Ultimately, I believe it’s a small win for whoever goes 2nd, but we can do better going first than they can because aside from Canis we outdamage them and outspeed them. I still think Infernal is better in the mirror than Lords of Dread because as good as Titanic Duel is, an invuln in melee is just so good in the mirror.
Also this mirror sucks. One of the hardest games I’ve played and we got close to clocking out. If I had to play this multiple times in a day, or at the end of a GT, it would be brutal on my brain.
Thanks for reading! I have battle reports against Eldar and Death Guard on the way, as well as a game where I bring a Tyrant.
Is the Tyrant going to be more than an expensive paperweight? Maybe! Subscribe to find out.

Leave a comment